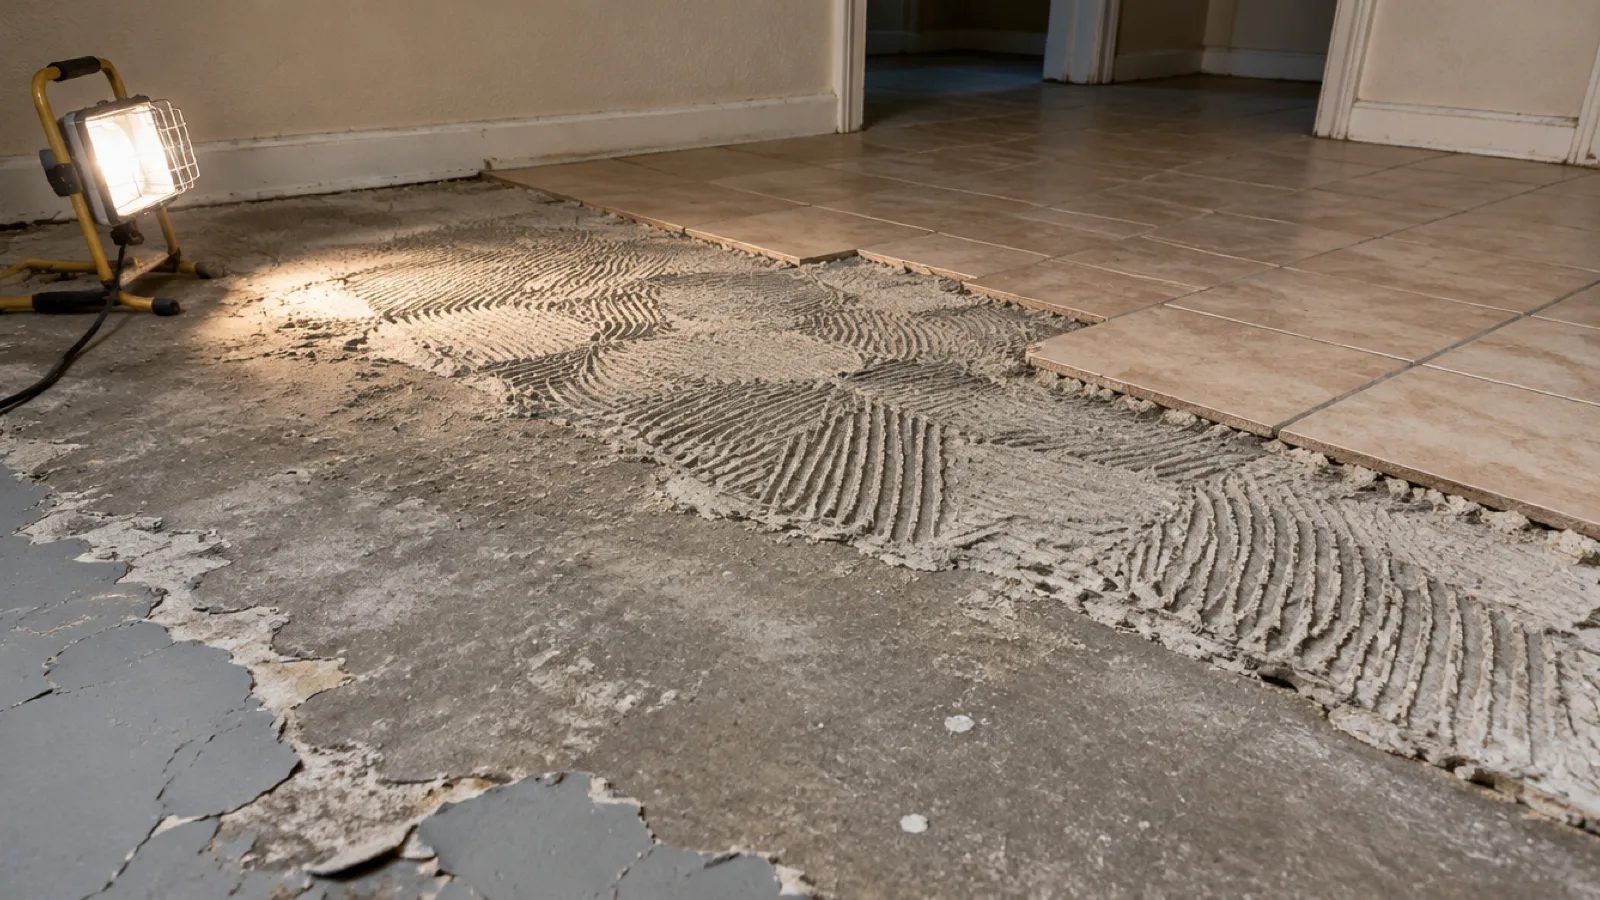
Sometimes, but the answer depends on what is under the coating, not on the coating itself. Epoxy can go over a sound, abraded previous epoxy and over concrete that has been opened up by grinding. It is a poor bet over glazed tile, vinyl and most garage floor paint. If you are weighing epoxy floor repair in San Antonio against a full recoat, the substrate verdicts and tests below show you which route your floor is likely to need.
Most floors we are asked about are not bare concrete. They are tile that has gone out of style, vinyl that is lifting at the seams, a garage floor with a coat of paint from a weekend project, or an older epoxy that is tired but still attached. The question is always the same: can the new coating go straight over the top and save the demolition?
This guide goes substrate by substrate and gives a verdict for each, along with the simple field tests that tell you whether the existing surface can stay. We do not repeat the general steps of getting concrete ready, because our article on concrete surface preparation for epoxy flooring already covers them, and we do not weigh epoxy against paint as a product choice, which is the subject of our comparison of garage floor epoxy versus paint. This post is about what happens when something is already on the slab.
Quick answer: substrate by substrate, go or no-go
Epoxy is a go over a sound, abraded previous epoxy, a conditional go over properly profiled bare or ground concrete, and usually a no-go over glazed tile, vinyl, sheet flooring and most garage floor paint. Every verdict below depends on bond, because a coating can only be as well attached as the layer under it.
Here is the short version before the detail:
- Ceramic and porcelain tile: possible only when every tile is bonded, the glaze is abraded and the grout lines are filled. Removal is the lower-risk route.
- VCT and sheet vinyl: removal almost always wins, and older adhesive needs testing before anyone disturbs it.
- Garage floor paint: stays only if it passes an adhesion test in several places. Most does not.
- Sealed or cured concrete: the sealer or curing compound has to come off mechanically before a coating will hold.
- Sound existing epoxy: abrade and recoat, after a compatibility test patch.
In every case the deciding evidence is a test on your own floor, not a rule of thumb. The test methods section later in this guide explains how to run them.
Ceramic and porcelain tile: bond, movement and the grout line problem
You can epoxy over ceramic or porcelain tile in a narrow set of conditions: every tile fully bonded to the slab, the glaze abraded so the coating can grip, and the grout lines filled flush. Miss any one of those and the coating will show it or lose its grip.
Start with bond. Tile is fastened to the slab with a thin layer of mortar, and over the years some tiles lose contact. Tap across the whole floor with a metal rod or the handle of a screwdriver. A solid, high-pitched tap means the tile is bonded. A dull, hollow sound means there is a void underneath. Hollow tiles will crack under traffic, and the coating over them will crack with them. Mark every hollow tile, because a few of them tell you the whole bed has a problem.
Next is the glaze. Glazed ceramic and porcelain are dense and have very little pore structure, which is the opposite of what a coating wants. Epoxy needs a surface it can key into, so the glaze has to be abraded with a diamond tool until it is uniformly dull. Cleaning alone does not change the surface.
Then there is the grout line. Grout joints are recessed below the tile face, often by an eighth of an inch or more, and a thin coating will not bridge them. Each joint has to be filled with a patching material that bonds to both the tile edge and the existing grout. Even with that work done, the pattern of the tile can ghost through a thin film, because the filled joints behave differently from the tile on either side.
Movement is the part that cannot be prepared away. In San Antonio, slabs sit on clay soils that swell and shrink with moisture, and a tile bed that has cracked along a slab crack will keep moving. Epoxy is rigid. A crack in the tile bed will telegraph straight through the coating, usually within the first year or two. Where the tile is cracked, loose or sitting over an active slab crack, take it out.
Check slip resistance before you decide. A smooth coating over glazed tile can be slick when wet. Wet traction is measured as dynamic coefficient of friction under ANSI A326.3, and the older ASTM C1028 method measured static friction. If the area sees water, plan on a broadcast aggregate or textured topcoat and verify the result, rather than assuming the tile floor's original rating carries over.
VCT and sheet vinyl: adhesive residue and why removal usually wins
Removal wins over vinyl composition tile (VCT) and sheet vinyl in almost every case, because epoxy does not bond reliably to vinyl and the adhesive underneath is a separate risk. Coating over the top means inheriting a bond you cannot inspect.
Vinyl is a plastic surface that contains plasticizers, and those can migrate into a coating over time and soften it. The seams between tiles or sheets also move slightly, and they show through the finished floor as lines. A floor that looks flat and tight today can have lifting corners, trapped moisture and failed adhesive that you cannot see until the coating fails.
The adhesive is the other half of the problem. Old mastic and cutback adhesive can be black, tar-like and tacky, and removal leaves a residue that blocks coating bond. In buildings from before the 1980s, floor tile and its adhesive have been found to contain asbestos. That is a reason to test before anything is scraped, ground or sanded, because disturbing it can release fibers. If a sample comes back positive, removal has to be handled by licensed abatement and not by a flooring crew.
Once the vinyl is up, the real work starts. The residue has to be removed down to the slab, usually with mechanical grinding, and the slab then needs to be checked for moisture. Vinyl and its adhesive can mask moisture problems for years. Two standard tests are used: ASTM F1869 measures moisture vapor emission with calcium chloride, and ASTM F2170 measures relative humidity in the slab with in-situ probes. Coating manufacturers publish their own limits for each test, so match the result to the data sheet of the product you intend to use.
Garage floor paint: identifying it and testing whether it holds
Most garage floor paint can be identified by feel and by a simple water or solvent check, and most of it will not pass an adhesion test well enough to stay under a new epoxy. Paint is the most common surface we find on garage slabs, and it is where the test matters most.
Start by looking at the floor. Paint tends to show hot tire pickup, where the coating has lifted in the shape of a tire track, along with flaking at the door threshold and thin spots in the wheel paths. A single-component product sold as an epoxy paint is still a paint. It is thin, usually water-based or solvent-based, and it was designed to be rolled on with minimal preparation. A two-part system with a hard, glassy surface is a different material and is treated under the existing epoxy section.
The tests are quick:
- Scratch test. Drag a coin or a putty knife across the surface. Paint that flakes off in sheets has a poor bond.
- Tape test. Press a strip of strong adhesive tape on the floor, rub it down and pull it off at a sharp angle. Any coating on the tape means a poor bond.
- Cross-hatch test. Cut a grid through the coating, tape it and pull. This is the standardized version and is covered in the test methods section.
Test in several places, not one. Look at the wheel paths, the door threshold, near the water heater or washer and in a corner. Paint that holds in a dry corner and fails under a tire is still a failed result. If any test area lifts, the paint has to come off, which means diamond grinding down to bare concrete. Our guide to why epoxy floors peel shows what happens when a coating goes over a surface that was never sound.
Sealed or cured concrete: the densifier and curing compound trap
Concrete that has been sealed, treated with a densifier or finished with a curing compound will not accept a coating until that treatment is removed, because it blocks the surface pores epoxy relies on. The trouble is that you often cannot see it.
There are three common culprits. New slabs are often sprayed with a curing compound to hold water during the cure, as described in the ACI 302.1R guide to concrete floor and slab construction. Older slabs may carry a clear acrylic or urethane sealer from a previous owner. Polished or ground floors are sometimes treated with a densifier, a liquid that reacts in the upper layer of the slab to harden it and reduce dusting. A densified slab takes in less of whatever is put on it, so the coating has less to key into.
The water drop test shows what you have. Place a few drops of water on the slab and watch for a minute or two. If the water soaks in and the spot darkens, the surface is open. If the drops bead up or sit on top, something is blocking the pores. Run the test in several places, because treatment can be patchy, and run it on a clean, dry floor.
Sealers and curing compounds do not come off with cleaner or an acid wash. They have to be removed mechanically, which in practice means diamond grinding or shot blasting to reach clean, open concrete. The target is a surface profile matched to the coating, described on the ICRI 310.2R scale as CSP 1 through 9. Thin-film coatings are generally matched to the lower end of the scale and thicker systems call for more profile. We cover this in more detail in our article on matching concrete surface profile to the coating.
Sound existing epoxy: abrade and recoat, with compatibility checks
You can apply new epoxy over old epoxy when the existing coating is sound, clean and compatible, and the surface has been abraded to give the new layer a mechanical key. This is the one case where leaving the old layer in place is routine.
Sound means bonded across the whole floor, with no peeling, blistering or soft spots. The existing coating should pass the adhesion tests in the next section in the wheel paths, at the doors and in the corners. A coating that is intact in the middle of the room and lifting at the edges is not sound, and the recoat will inherit the failure.
The surface then needs two kinds of attention. First, contamination: oil, wax, floor polish and tire residue all stop a recoat from bonding, and they have to be cleaned with a degreaser and rinsed. Second, gloss: a hard, glossy epoxy has no profile, so it is abraded with a diamond pad or a screening machine until the entire surface is uniformly dull. Cracks and chips are filled and sanded before the new coating goes on, and any area where the old coating has failed is cut back to bare concrete and feathered into the surrounding film.
Compatibility is the last check. Epoxy over epoxy is usually fine, but a different product family, such as a solvent-based coating over a water-based one, can lift or wrinkle the old film. A test patch settles it: coat a small area, let it cure for the time stated on the data sheet and then run the adhesion test on the patch. If the old layer lifts, softens or fisheyes, stop and take the old coating off.
Test methods: solvent rub, cross-hatch adhesion, pull-off
Three tests cover nearly every decision in this guide: a solvent rub to identify the coating type, a cross-hatch test for adhesion of thin films, and a pull-off test for measured adhesion strength on thicker systems. The first two cost almost nothing and can be done in an afternoon.
Solvent rub. Soak a clean white rag in the solvent the coating manufacturer specifies, usually acetone or MEK, and rub a small hidden area with firm strokes. Work with open doors and fans, wear gloves and eye protection and keep flame sources away. Latex paint softens quickly and comes off on the rag. A cured two-part epoxy dulls slightly or resists. The result tells you what is on the floor, which is the first fact you need.
Cross-hatch adhesion. ASTM D3359, method B, uses a cutting tool to make a grid through the coating down to the substrate, usually with a spacing of 1 or 2 mm depending on film thickness. Tape is pressed onto the grid and pulled off, and the grid is rated by how much coating comes away. The method is meant for thin films. For thicker systems, the pull-off test is the better measure.
Pull-off adhesion. ASTM D4541 bonds a small metal dolly to the surface, then pulls it away with a calibrated tester and records the force in pounds per square inch or megapascals. The failure mode matters as much as the number. A failure inside the concrete means the coating bond was stronger than the concrete. A failure at the interface or in the old coating means the weak layer is in the system, and the coating manufacturer sets the minimum acceptable value.
Whichever test you use, run it in more than one place and record where. Floors vary, and one passing spot says nothing about the wheel path.
A test is evidence, not a guarantee. A passing result means the surface is a reasonable base for the coating. It does not replace moisture testing, a manufacturer's data sheet or an on-site look at the whole floor.
Decision table: substrate against test, preparation required, verdict
This table pulls the substrate verdicts together, with the test that settles each one and the preparation that follows. It is a screening tool, and your floor may land differently once it is tested.
| Existing surface | Test to run | Preparation required | Verdict |
|---|---|---|---|
| Ceramic or porcelain tile | Tap test for hollow tiles, then cross-hatch or pull-off on a prepared area | Abrade the glaze, fill grout joints often 1/8 in. or deeper, repair cracks | Rarely advised Removal is lower risk |
| VCT or sheet vinyl | Adhesive test for asbestos in older buildings, then moisture tests per ASTM F1869 and F2170 | Remove the covering, grind off adhesive residue to the slab | No-go Remove first |
| Garage floor paint | Scratch, tape and cross-hatch in several areas | If it passes, clean and abrade. If it fails, grind to bare concrete | Usually fails Remove if any area lifts |
| Sealed or cured concrete | Water drop test in several places | Mechanical removal by diamond grinding or shot blasting to the CSP the coating requires | Conditional Only after the sealer is gone |
| Sound existing epoxy | Cross-hatch for thin films, pull-off for thick, plus a compatibility test patch | Degrease, abrade to a uniform dull, fill cracks and cut back failed areas | Go Abrade and recoat |
If your floor does not fit one row, it is probably a layered case, such as paint over a sealer or a patched tile. Layered floors are the ones where an on-site look and a few tests save money, because they show whether the coating decision should be made before demolition and not after.
When removal is the better call
Removal is almost always the lower-risk choice, because it costs more up front and eliminates the uncertainty of a bond you did not create and cannot inspect. It is the right call whenever a test fails, whenever the old surface is loose or moving and whenever the floor must hold up under heavy use.
The reasoning is simple. Every layer you leave in place adds an interface where the system can fail, and the failure usually shows up after the coating is down and cured. Taking the floor back to open, sound concrete leaves one interface to manage: the new coating against the slab. For a garage, a basement or a shop where the floor takes heat, moisture or heavy loads, that is a sound trade. If you are choosing between coating over a tile floor and replacing it, our guide to basement floor epoxy versus tile walks through the same decision for a below-grade space.
Removal does not always mean a full tear-out. A damaged area can be cut back and repaired, then blended into the surrounding floor. That is the kind of decision our epoxy floor repair service handles, and it is the quickest way to find out whether your floor needs a patch, a recoat or a full strip. For a free on-site measure and written quote, call (830) 355-3303.
Frequently asked questions
Can you epoxy over ceramic tile?
It is possible but rarely advisable. The tile must be fully bonded, the glaze abraded and the grout lines filled, and any movement in the tile bed will telegraph straight through the coating. Removing the tile is usually the lower-risk route, especially where tiles are hollow, cracked or sitting over a slab crack.
Can epoxy go over painted concrete?
Only if the paint is firmly bonded, and most garage floor paint is not. A cross-hatch or tape adhesion test on several areas, including the wheel paths and the door threshold, will show quickly whether it can stay. If any area lifts, the paint has to be ground off.
How do you know if concrete has been sealed?
Water beads rather than darkening the surface, and a drop sits instead of soaking in. Sealers and curing compounds have to be removed mechanically, by diamond grinding or shot blasting, because coatings will not bond through them. Test several spots, since treatment can be patchy across a slab.
Can you apply new epoxy over old epoxy?
Yes, when the existing coating is sound and compatible. It needs abrading to create mechanical key, and a test area is sensible to confirm the new product bonds and does not lift the old one. Failed or peeling areas should be cut back to bare concrete first.
Is removing the old floor covering always better?
It is almost always the lower-risk route. Removal costs more up front and eliminates the uncertainty of inheriting a bond you did not create and cannot inspect. It is the safer choice whenever a test fails, the old surface is loose, or the floor will carry heavy use.