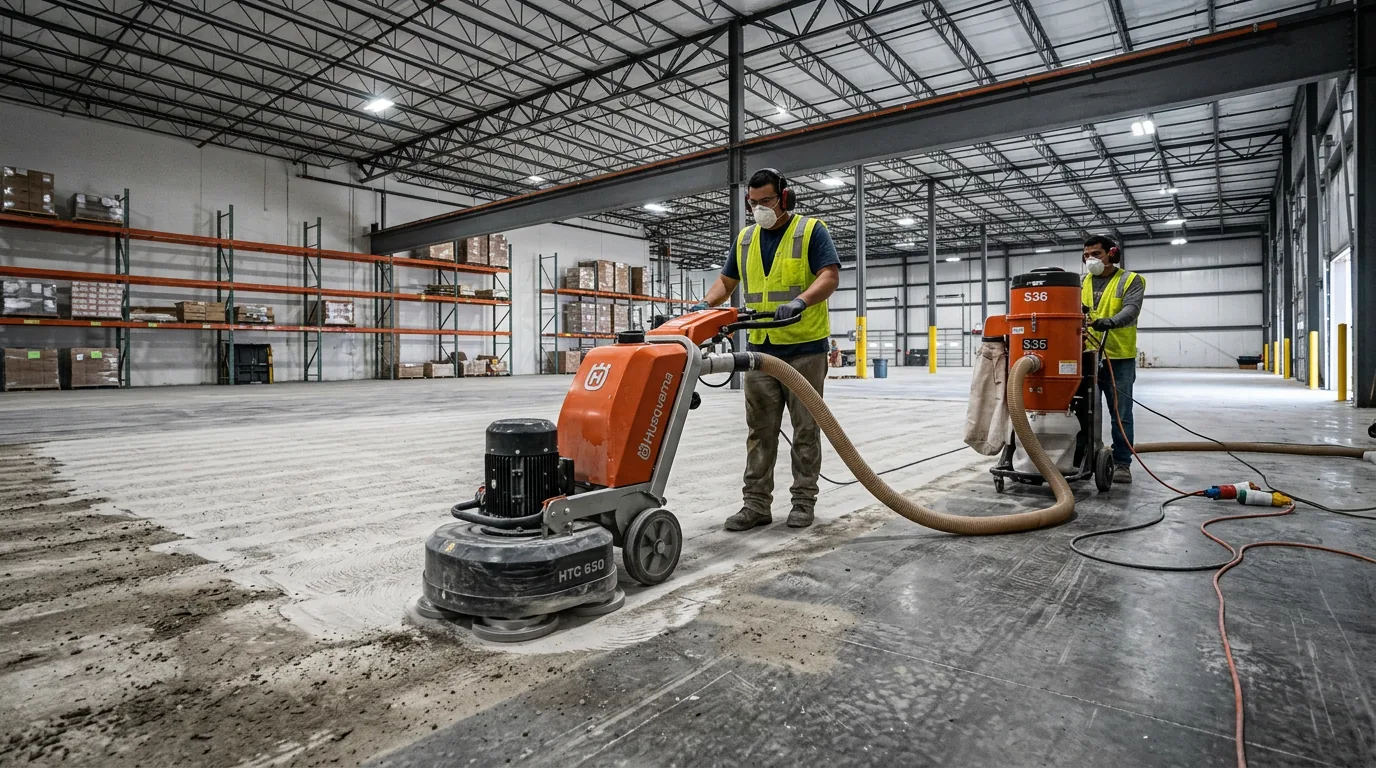
Why Surface Preparation Is the Most Important Step
Industry data from the International Concrete Repair Institute (ICRI) consistently shows that 80% or more of floor coating failures are attributable to inadequate surface preparation rather than product failure. A premium epoxy applied to poorly prepared concrete will fail faster than a budget epoxy applied to a properly prepared surface.
In San Antonio, this problem is amplified by the local concrete conditions. Bexar County has high ambient humidity, expansive clay soil that causes slab movement, and a warm climate where concrete stays warm year-round - all conditions that accelerate the consequences of inadequate preparation. Understanding what proper prep looks like helps you evaluate whether a contractor is doing the job correctly before you see the floor fail.
Step 1: Concrete Assessment and Contamination Removal
Before any mechanical preparation begins, the concrete substrate must be assessed for:
- Existing coatings or sealers: Paint, curing compounds, silicate sealers, and existing epoxy coatings must be identified. Some grind off; others require chemical stripping first. Applying epoxy over a curing compound is a guaranteed delamination failure.
- Oil and grease contamination: Garage floors in San Antonio frequently have years of oil drip contamination in specific zones. Oil penetrates porous concrete and must be removed with alkaline degreasers and pressure washing before grinding - grinding alone drives surface oil deeper into the slab.
- Concrete hardness: Dense-troweled or burnished concrete (very smooth surface, often found in warehouse slabs) requires a more aggressive profile method (shot blasting) than porous residential garage slabs.
- Cracks and joint condition: Map all cracks, control joints, and construction joints before prep begins. Decide which will be filled rigid, which flexible, and which left open.
Step 2: Mechanical Surface Preparation
ICRI Technical Guideline No. 310.2R defines concrete surface profiles (CSP) from 1 (lightest) to 9 (roughest). High-build epoxy coatings require a minimum of CSP 3 for reliable adhesion; heavy-duty industrial systems require CSP 4–5. The two primary methods for achieving adequate profile are:
Diamond Grinding
Diamond grinding uses rotating diamond-segment tooling to mechanically remove the concrete surface layer. It produces a consistent, flat profile suitable for most residential and light commercial applications. Key advantages: excellent for correcting surface lippage and high spots, works well in tight spaces, produces less substrate damage than shot blasting. Limitations: slower than shot blasting for large areas, and less effective at removing embedded contamination than shot blasting.
ProEpoxy uses HEPA-filtered dust extraction systems on all grinding equipment - required under OSHA 29 CFR 1926.1153 for respirable crystalline silica control. Grinding without dust control is a health hazard and an OSHA violation.
Shot Blasting
Shot blasting propels steel shot at high velocity against the concrete surface, mechanically abrading it to create profile. It is the preferred method for large warehouse floors, commercial spaces, and any area where dense-troweled concrete or embedded contamination requires aggressive mechanical action. Shot blasting produces a more uniform profile than grinding across large areas and removes surface laitance more effectively.
In San Antonio garages, shot blasting is typically overkill for residential work - the additional profile depth achieved over grinding doesn’t justify the cost for a standard chip broadcast system. However, for commercial applications with forklift traffic or chemical exposure, shot blasting to CSP 3–4 is the correct specification.
Step 3: Moisture Testing
Moisture vapor transmission (MVT) is the leading cause of coating failure in San Antonio. ASTM F2170 in-situ relative humidity (RH) testing is the industry standard for measuring concrete moisture. Sensors are installed in holes drilled to 40% of the slab depth and allowed to equilibrate for a minimum of 24 hours before reading.
Standard epoxy coatings require concrete RH below 75–80% for stable adhesion. Above that threshold, a moisture mitigation primer (typically an epoxy-polyamine or moisture-tolerant epoxy) must be applied as the first coat to reduce MVT to acceptable levels before the primary coating system is applied.
Calcium chloride tests (ASTM F1869) are also used - they measure moisture emission rate (MVER) rather than slab RH. The limit for most epoxy systems is 3 lb/1000 sq ft/24 hr. Both tests have a role; the in-situ RH probe is more predictive of long-term moisture behavior in a San Antonio climate.
Step 4: Crack and Joint Treatment
After profiling and before priming, all cracks and joints are treated:
- Dormant (non-moving) cracks: Routed to a V-profile, cleaned with compressed air, and filled with a low-viscosity 100% solids epoxy filler. Allowed to fully cure before the next coat.
- Working (moving) cracks and control joints: Filled with semi-rigid polyurea joint filler (ASTM C1193 compliant, 80–100% elongation). Rigid fillers applied to moving joints crack again under thermal cycling - common in San Antonio’s temperature range. Semi-rigid polyurea accommodates movement while supporting the coating edge against impact.
- Saw-cut control joints: Left partially open (filled with semi-rigid polyurea to just below the surface) or honored through the coating system with a surface saw-cut over the joint - which approach depends on the floor’s traffic load and the owner’s tolerance for visible joint lines.
Step 5: Primer Application
The primer penetrates the prepared concrete surface, filling micro-voids, providing a chemical anchor for the body coat, and (where specified) providing moisture mitigation. Primer application rate matters: too thin means insufficient penetration; too thick means extended cure time and potential entrapment of solvent vapor.
For standard residential garage applications in San Antonio, a 100% solids epoxy primer at 200–300 sq ft/gallon coverage is typical. For commercial work with higher moisture, a moisture-tolerant primer at 150–200 sq ft/gallon is more appropriate. All primer is applied before the body coat - it is not optional.
What to Ask Your Contractor
When evaluating epoxy contractors in San Antonio, ask these specific preparation questions:
- What CSP profile will you achieve, and how will you verify it?
- Will you do moisture testing before installation?
- What equipment will you use for preparation? (Rental grinder vs. professional shot blaster matters.)
- How will you handle existing oil contamination in my garage?
- Will you fill cracks before coating, and what filler will you use?
A contractor who can’t answer these questions specifically is not adequately preparing your floor. Call (830) 355-3303 or get a written preparation specification from ProEpoxy before your project begins.
Get a Free Quote for Your San Antonio Floor
ProEpoxy installs epoxy, polyaspartic, urethane cement, and polished concrete in the San Antonio metro - using our own crews, not subcontractors. We test every slab before we quote and back our work with a written warranty.
Request Free Estimate →